a cover of mine//-erchomai
TUTORIAL DIFFICULTY: E A S Y
Hey guys! Today I'm going to be showing you how to do this cover;

Of course you can customise it how you'd like and don't have to use the same images as me but I will put them together below and just message me if you'd actually like them!

Images used ^^^ (sorry for the messiness, I did this quickly aha)
Okay! Lets get started!
V E C T O R
For this cover, I will be using photoshop. I'm not sure if it works for other apps but I'm pretty sure you could use pixlr as well (it is a free website). So open up the app you will be using and open up the image of the person you will be using! I will be using this fabulous picture of Namjoon:
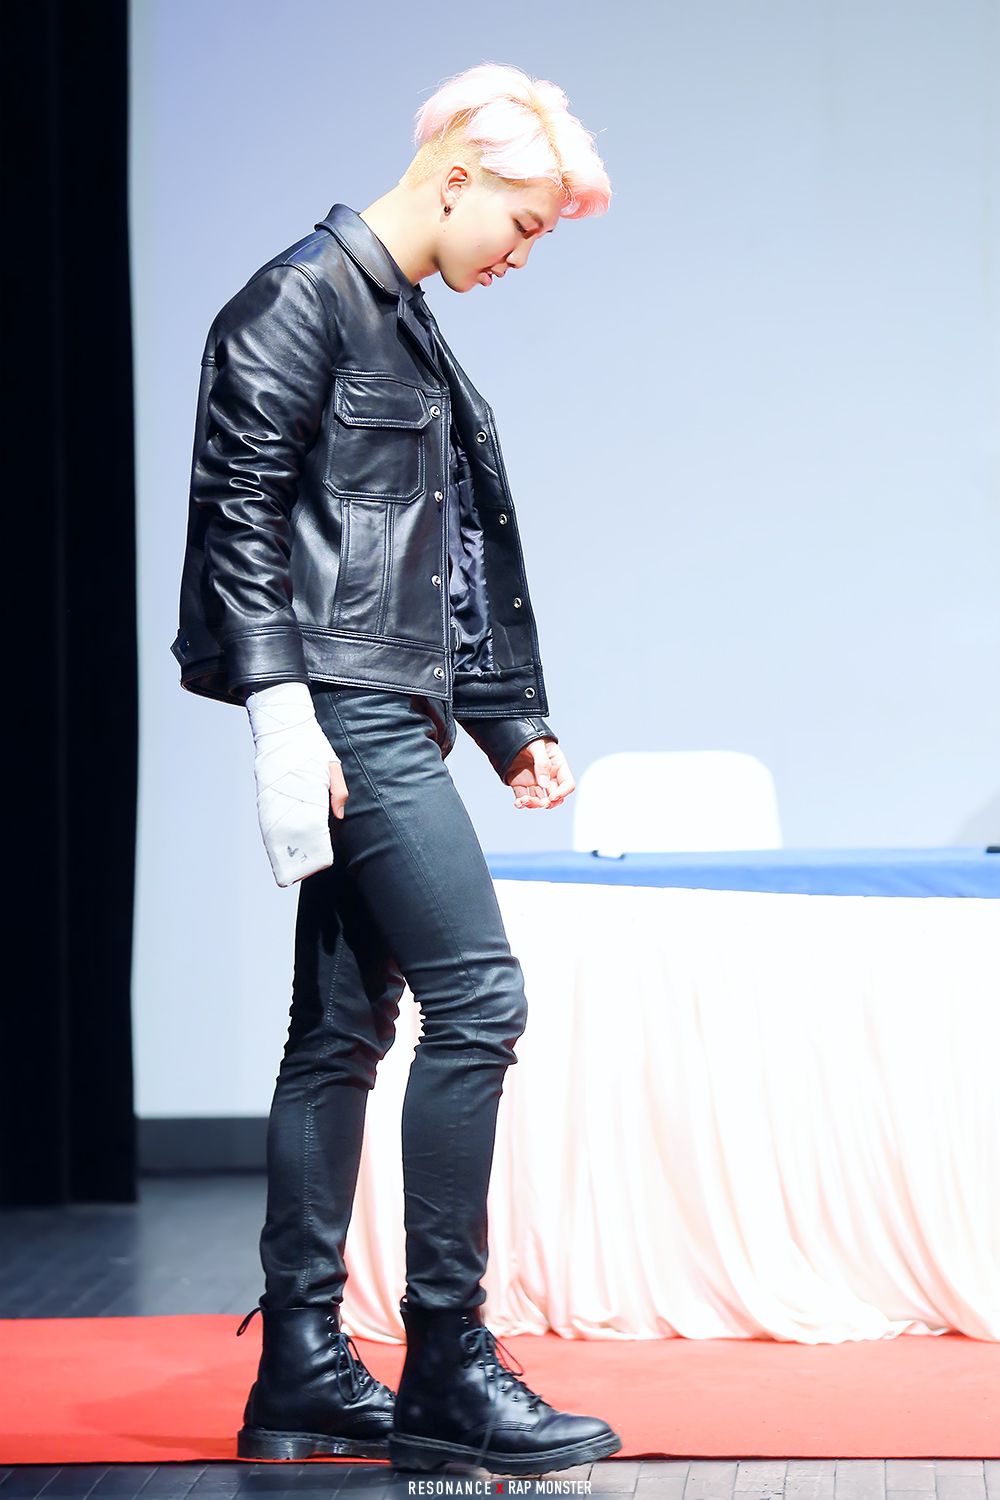
[Slay boy slay]
Anyway, open your image up in photoshop (or whatever app you are using) and click onto the polygon lasso tool

For my vector, I only need three new layers for the colours I was using. You guys may need more, depending on the model or person you are using. I'll start off with the black parts of my model.
On the layers tab, click the icon at the bottom that looks like a piece of paper with the left corner folded, and rename it the colour you'll be doing (I'll be naming it Black).
Using the "Polygon Lasso" tool, outline the item of clothing/skin you will be colouring first.

Once the dashed lines come up, click the paint brush tool and choose the selected colour you will be filling it in with. Once you have done that, paint as much as you'd like in the dashed lines and it won't go outside of them (make sure your new layer with the colour name is selected though). Repeat this as many times as you'd like with all your needed colours.
For my skin colour, I used the colour code: #e9c4aa
Because in my chosen photo Namjoon has a hand cast on and I wouldn't like that in my cover, I needed to photoshop a hand on (which is where the other photo of Namjoon came in). This may not be need for you guys so I won't go into details, but if you would, don't be afraid to message me!
Once you have finished adding blocks of colour to your model (and you can click the actual photo off without gaps between the colour), select all the layers (apart from the actual photo) and group them together. Name this group Vector.
And ta da, your vector is done!
T E X T
Under this part I'll show you how I did my text.
The font I used was Supernatural Knight Regular in all caps. I'll leave the download link in the comments and external link!
Type your title out in all caps and put it to the size you'd like. As my title was small, I put it as the size 170pt and right margined it. (my cover size was 518x800 pixels).
Right clicking on the text layer, select blending options... and a table should show up. This is great!

The blues are #0060ff ^^^

Colour is #00fffc ^^^
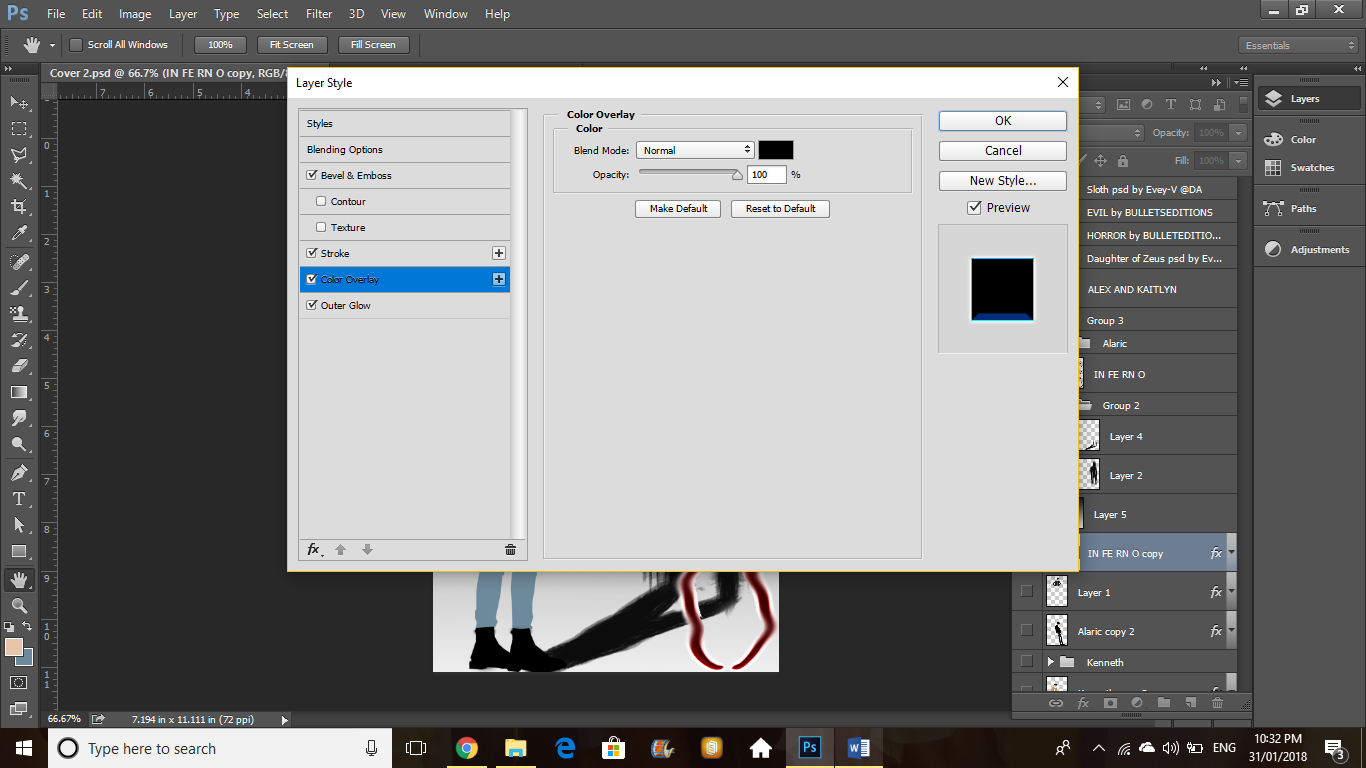
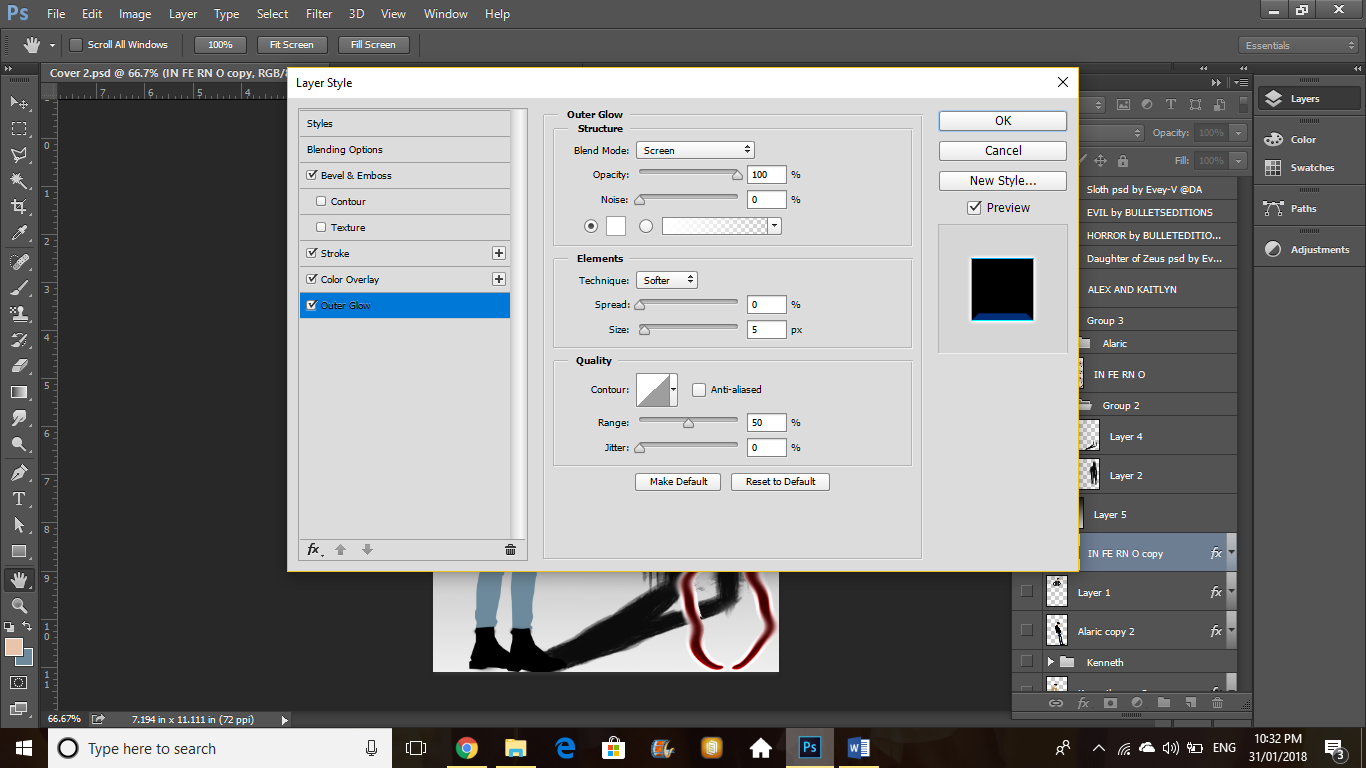
If you want to change the colours or anything, the outerglow can just be left alone and the rest can be changed by moving the colour spectrum up and down.
C O V E R
Open up a new canvas with the dimensions 518x800 pixels.
For the background, I did a black and white gradient but you can fill it up with whatever colour/colours/patterns you'd like! I do however recommend using a plain colour background as it is easier for the shadow to be seen!
Anyway, drag your Vector group and text (unless your text is already on this canvas) onto your cover background and position them how you would like. With the vector, make sure there is enough space to either the left or right or even behind to make the shadow if you want to add one!
We're going to start with the smudged text effect (if you would like to add it, once again, not necessarily needed). Click on the smudge tool (the icon is a hand with a finger pointed out) and turn the strength to 14%.
Rasterize your text layer and then brush over the parts of the text you'd like smudged twice. Do this to all parts of your text. Place your text layer above the background layer and the vector above the text layer.
Now for the shadow.
I searched "Demon Shadow" in order to find this. You may use whatever shadow you'd like but make sure it is easy to manipulate. If you want to use a demon one like mine, make it bigger than the vector and place it either behind, to the left or to the right of the vector so it looks like a shadow. They do not have to connect yet.
If you have a ragged kind of shadow, I used the Flat Blunt Short Stiff brush, size 60pt and the wheel turned so the arrow is turned upwards. Using the same colour as the shadow, I drew from the legs of the shadow to the legs of the vector, making sure that the two legs of the shadow ended up connecting into one.
Place the shadow part layers beneath the vector layers. If you'd like the shadow to come in front of the text in parts like I did, simply erase parts of the text in places that the shadow is and it will appear in front.
And you should have the finished result like mine! The authors text can be placed anywhere and you can use whatever PSD Colouring's you liked, I didn't end up using any in the end though.
I hope you guys liked this tutorial! If you don't understand anything then don't be afraid to message me or tag me in the comments below! Remember to request for tutorials you'd like to see and to give credit if you end up using this tutorial for a cover!! Byeee
Bạn đang đọc truyện trên: Truyen2U.Com